
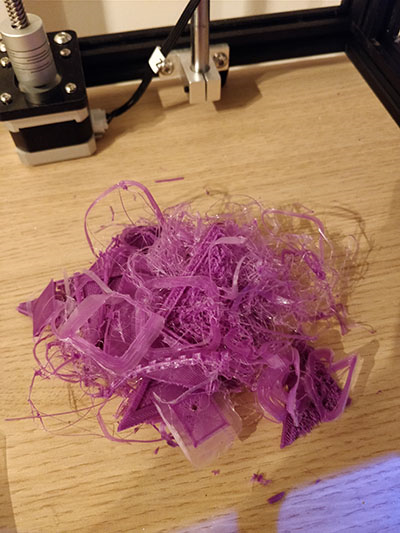
After a year of hard work, you finally realize it’s the time to compensate yourself with some toys. And… One word in short, you bought yourself a 3D printer but you regretted after a day or two. Because you saw the stuff it printed was so different from what was advertised. A lot of your precious printing martial has gone to the hall of shame (like this), and you still don’t have a clue.
So, what went wrong?
Alright, might be something as simple as not enough power supply or as complicated as some hardware / software combined issues. Here is what I did after I received and assembled the cheap printer I bought from AliExpress with 250 Euros.
- Find the system zero and level the print plate (hot bed). This step is very very important because it will make a significant difference on the success of the printing. The first layer is where the 3D model is built based on and a proper nozzle to plate distance will ensure the first layer to stick on the plate and have an adhesive surface. Also, an uneven building plate will possibly lead to the products to have curling or rough corners or even not able to be printed.
It is easy to level the plate. A suitable distance between the nozzle and the plate is the thickness of a piece of paper. Make sure when the Z axis is on its zero position, the nozzle have the equally space towards the plate on all of its corners and at the middle. Adjust the screw until its ready to go. - Run the self-checking function every time before printing. Don’t skip this just because it’s tedious.
- Enable the brim setting.